When using MvvmCross in a cross-platform mobile project you have the choice of four different approaches for creating the iOS user interface. Xamarin.Forms is one of those approaches that can be a good choice for many use cases (even if there is not graphical designer at this point). However, if your view has very specific visual requirements, it may be necessary to create a native view. There are three different ways you can do this:
- Hand-coded: Create all visual elements in code. This approach is more widespread on iOS than on most other popular platforms. It gives you the advantage of having the maximum control possible over your user interface.
- XIB files: XIB files are XML files that describe the visual elements. XIB files are typically not edited by hand but created using Xcode’s Interface Builder. Since Xamarin 4, XIB files can also be visually created and modified in Xamarin Studio or Visual Studio.
- Storyboard files: This is the newest approach. Storyboards are also XML files visually edited with Xcode, Xamarin Studio, or Visual Studio yet they contain not only a single view but a series of views along with the workflow to navigate between these views.
MvvmCross supports all three native approaches.
Hand-coded
This approach obviously produces the most code. It may be challenging for people new to the platform but it saves you the hassle of battling with the UI designers.
XIB files
If you’re already on Xamarin 4 and prefer a visual editor, this is likely the best choice for you. Create a new XIB View Controller file using Xamarin Studio or Visual Studio. The ViewController code will also be created for you. All you need to do for MvvmCross is to change the base class from UIViewController to MvxViewController. In the example, three UI elements were created using the designer and were given the (not so creative) names UiLabel, UiTextField, and UiButton. These elements are then referenced in the data binding code that is common to all three approaches.

Storyboard files
The big advantage of storyboards, the ability to design your screenflow in the designer, does not fit well with MvvmCross’s cross-platform navigation approach. If you define a transition from view A to view B in the designer it will only apply to the iOS platform. It is typically a better idea to move this navigation logic down into the cross-platform code inside your ViewModels. That is why it’s best to use a one-ViewController-per-storyboard approach when using storyboards in MvvmCross.
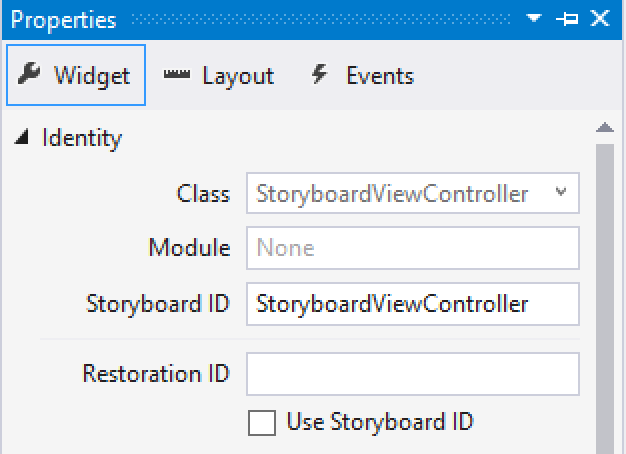
In the editor, you need to set the storyboard ID to the name of your ViewController. As with the XIB approach, change the base class from UIViewController to MvxViewController. Create a constructor taking an IntPtr and passing that on to the base class’s constructor. The last step is to add the [MvxFromStoryboard] attribute to the class.
Summary
The good thing is: You don’t have to make this decision at project start. MvvmCross supports implementing your view with the technology that is best for each view. You only need to ensure you don’t have multiple views for the same ViewModel and the same platform.
I’ve updated the example in the MvvmCross Starter Pack Nuget (starting with 4.0.0-beta8) to use a XIB file instead of the previous hand-coded approach with absolute coordinates (from the auto layout days). That should make it easier for people to get started.