Categories
Podcast

32: What’s new in C# 8. With Tom Deseyn

On this episode of DevTalk I speak to Tom Deseyn about all the new features in C# 8.

Links:

Categories
Programming

Calling C/C++ libraries from Xamarin code

The Xamarin platform allows developing iOS and Android applications entirely in C#. Sometimes, however, some legacy code may be too large or complex to make porting it to C# for your mobile app worthwhile. Most examples found online show you how to use existing Objective-C libraries in Xamarin.iOS and existing Java libraries in Xamarin.Android. However, it is entirely possible to call C code from a Xamarin app. Microsoft’s recent support for C/C++ on iOS and Android in Visual Studio can make this a simple task.

You will need the sources for the code you want to call to compile it for iOS and Android. The code cannot access any libraries which you only have binaries for that have been compiled for other platforms.

To get started, create a new C++ cross-platform project using Visual Studio 2015.
Create new cross-platform project
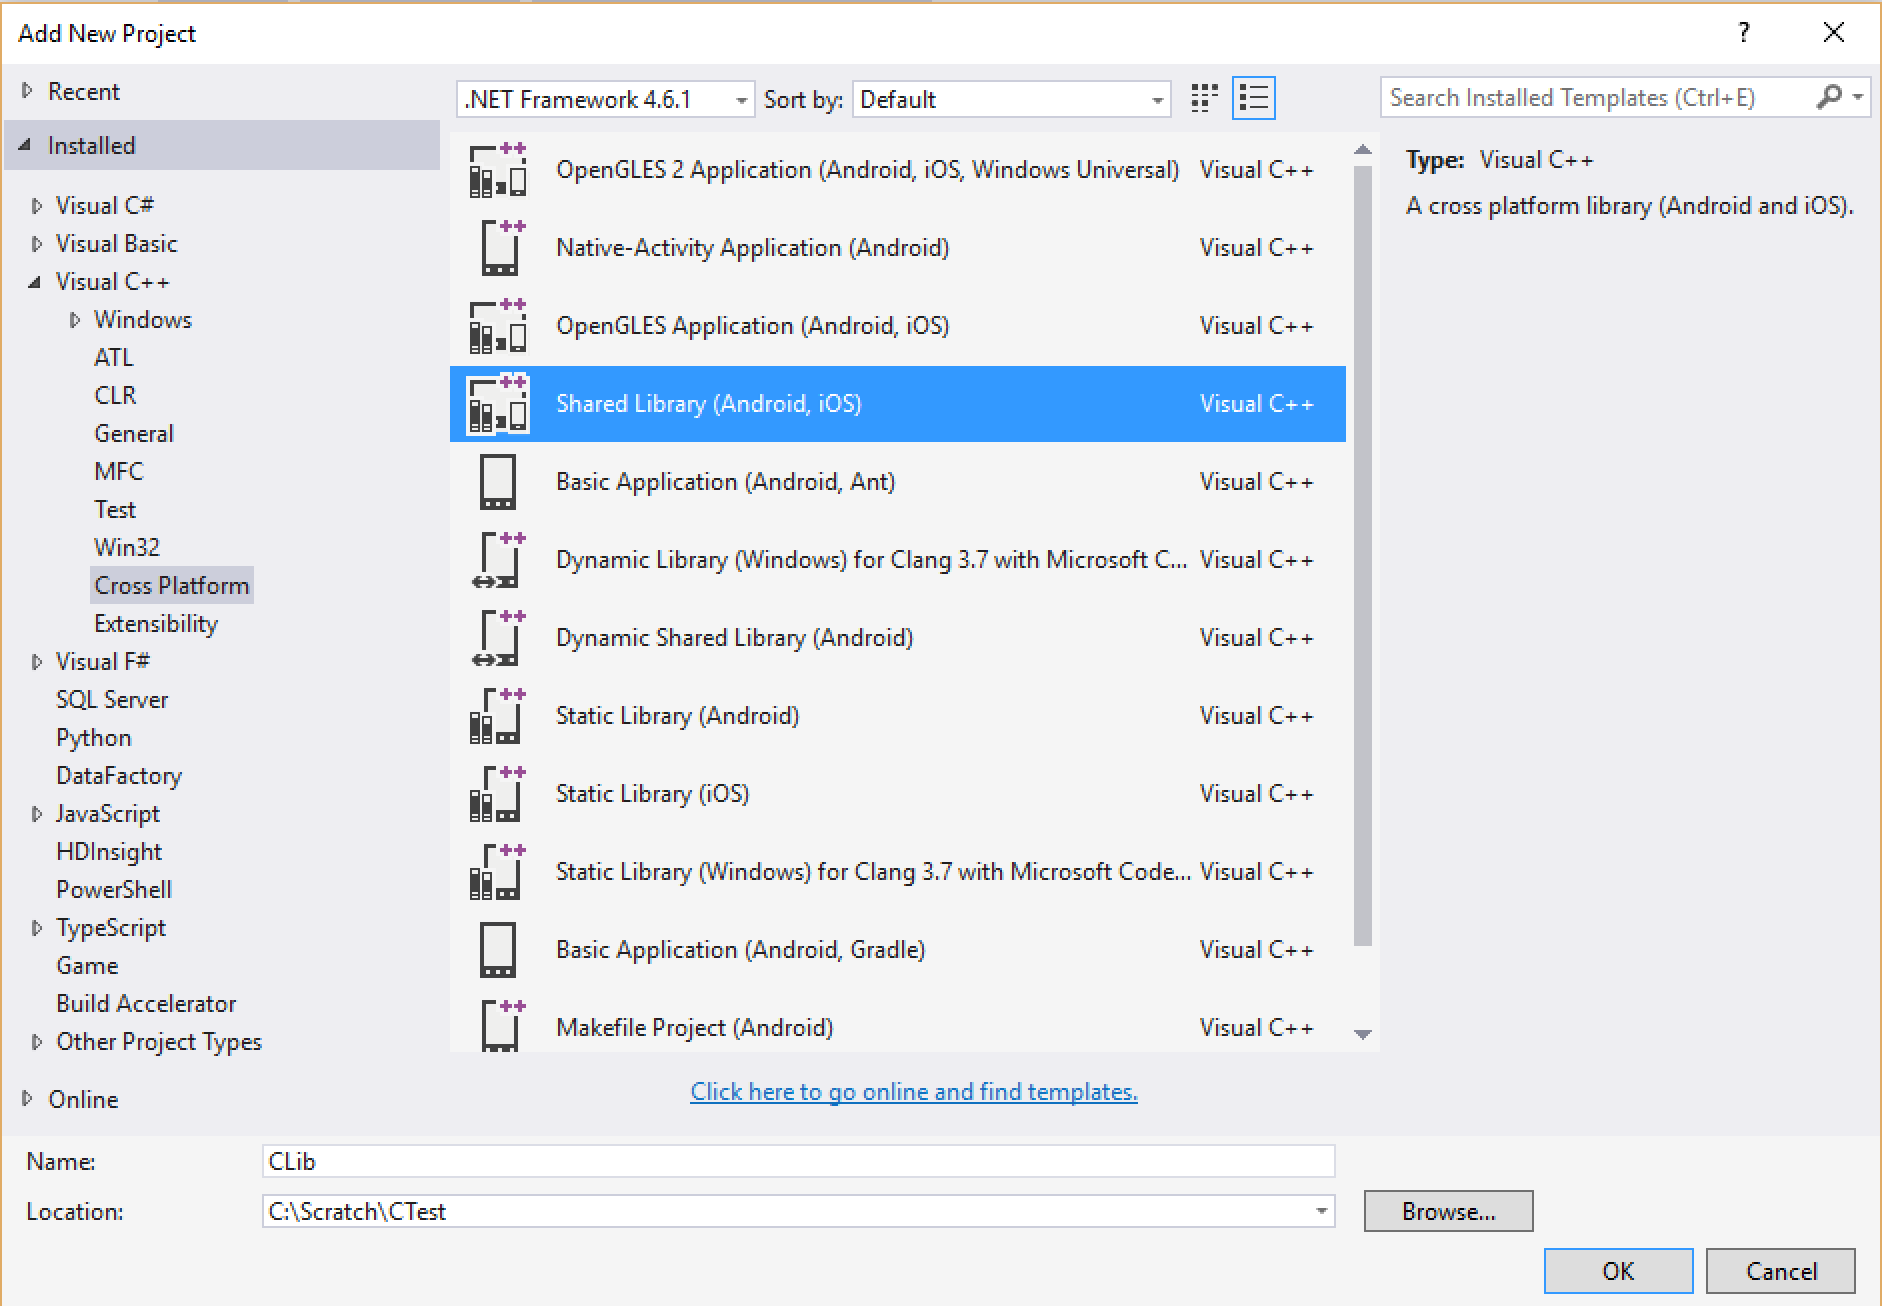
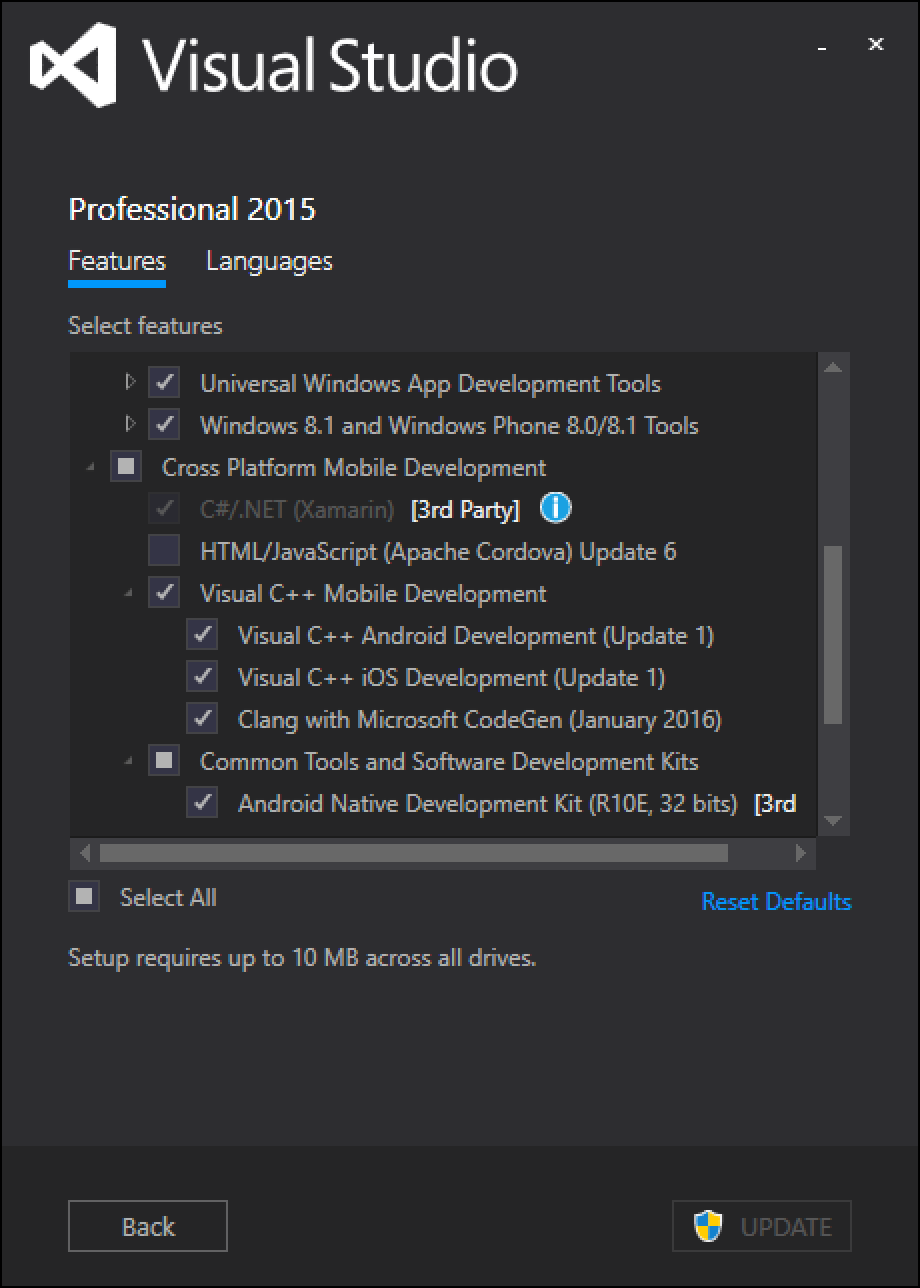
You will need to have the corresponding Visual Studio package installed to have this option available.
Visual Studio Setup Cross-Platform Mobile C++
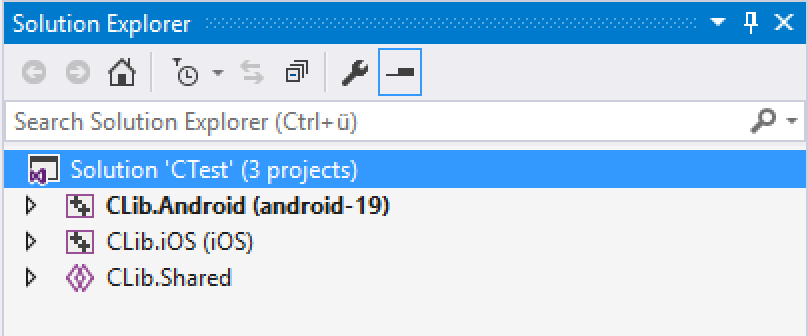
This will create three projects: one for Android, one for iOS, and a shared project.
Project structure

It is important to understand the shared project concept for this. The code in the shared project does not result in a DLL or library being generated. A shared project can hold any type of file. Projects referencing the shared project can access code from any file in the shared project. The code will then be compiled in the context of the referencing project. If code is not referenced, it is not compiled. For this reason, it is necessary to have calls into all code needed contained in the platform-specific projects. This means that the platform-specific C/C++ projects need to contain code, too. This code can be identical in the Android and iOS projects and reside in the same files. Unlike in .NET projects, file linking is not needed for C++ projects; source code files do not have to reside inside a project’s folder or subfolder.

In the example, I’ve created a simple function clib_add_internal() that add two integers and resides in the shared project.


This code is called from a function in the platform-specific projects.

For the example code, this doesn’t make any sense. For a real project, you will put any call that needs to be directly invoked from the .NET code (your interface) into the platform-specific projects while underlying code can reside in the shared project.

The calls from .NET will be using P/Invoke since C++/CLI is not available on iOS or Android. So the basic P/Invoke rules apply for your interface’s code: Either the code is plain C or, if you are using C++, the calls are either plain functions or static methods and contain only POC parameters and return values.

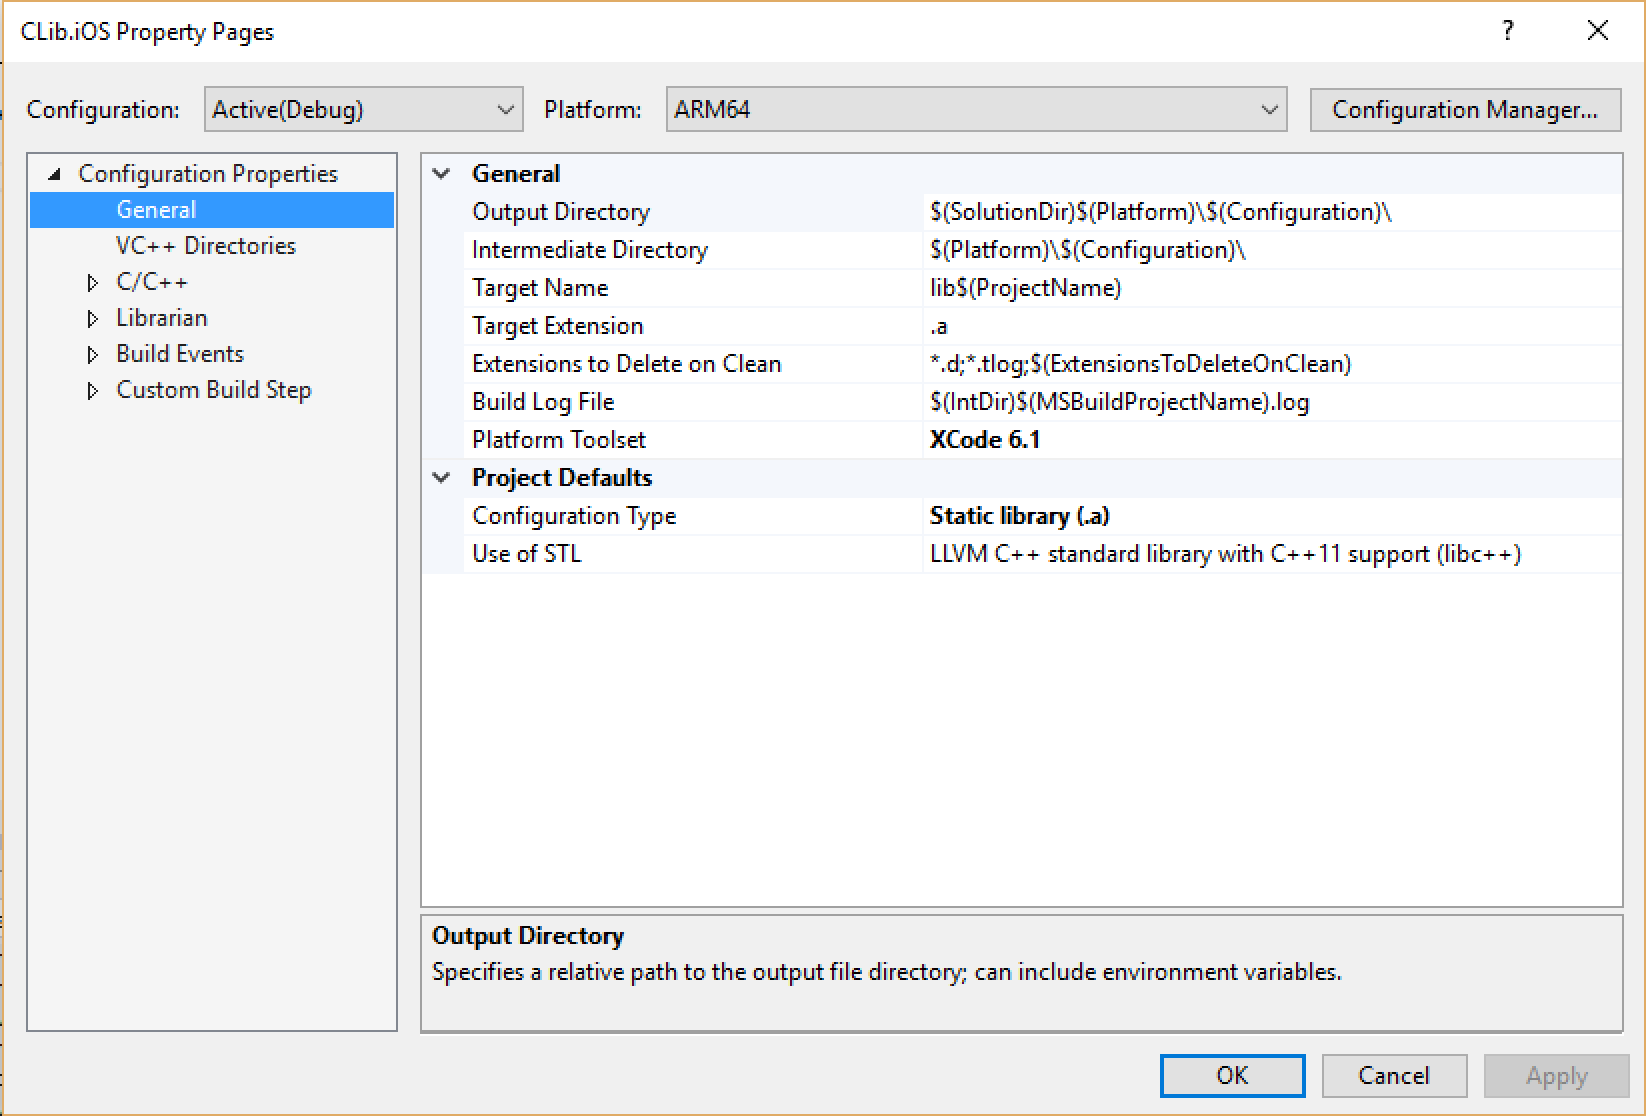
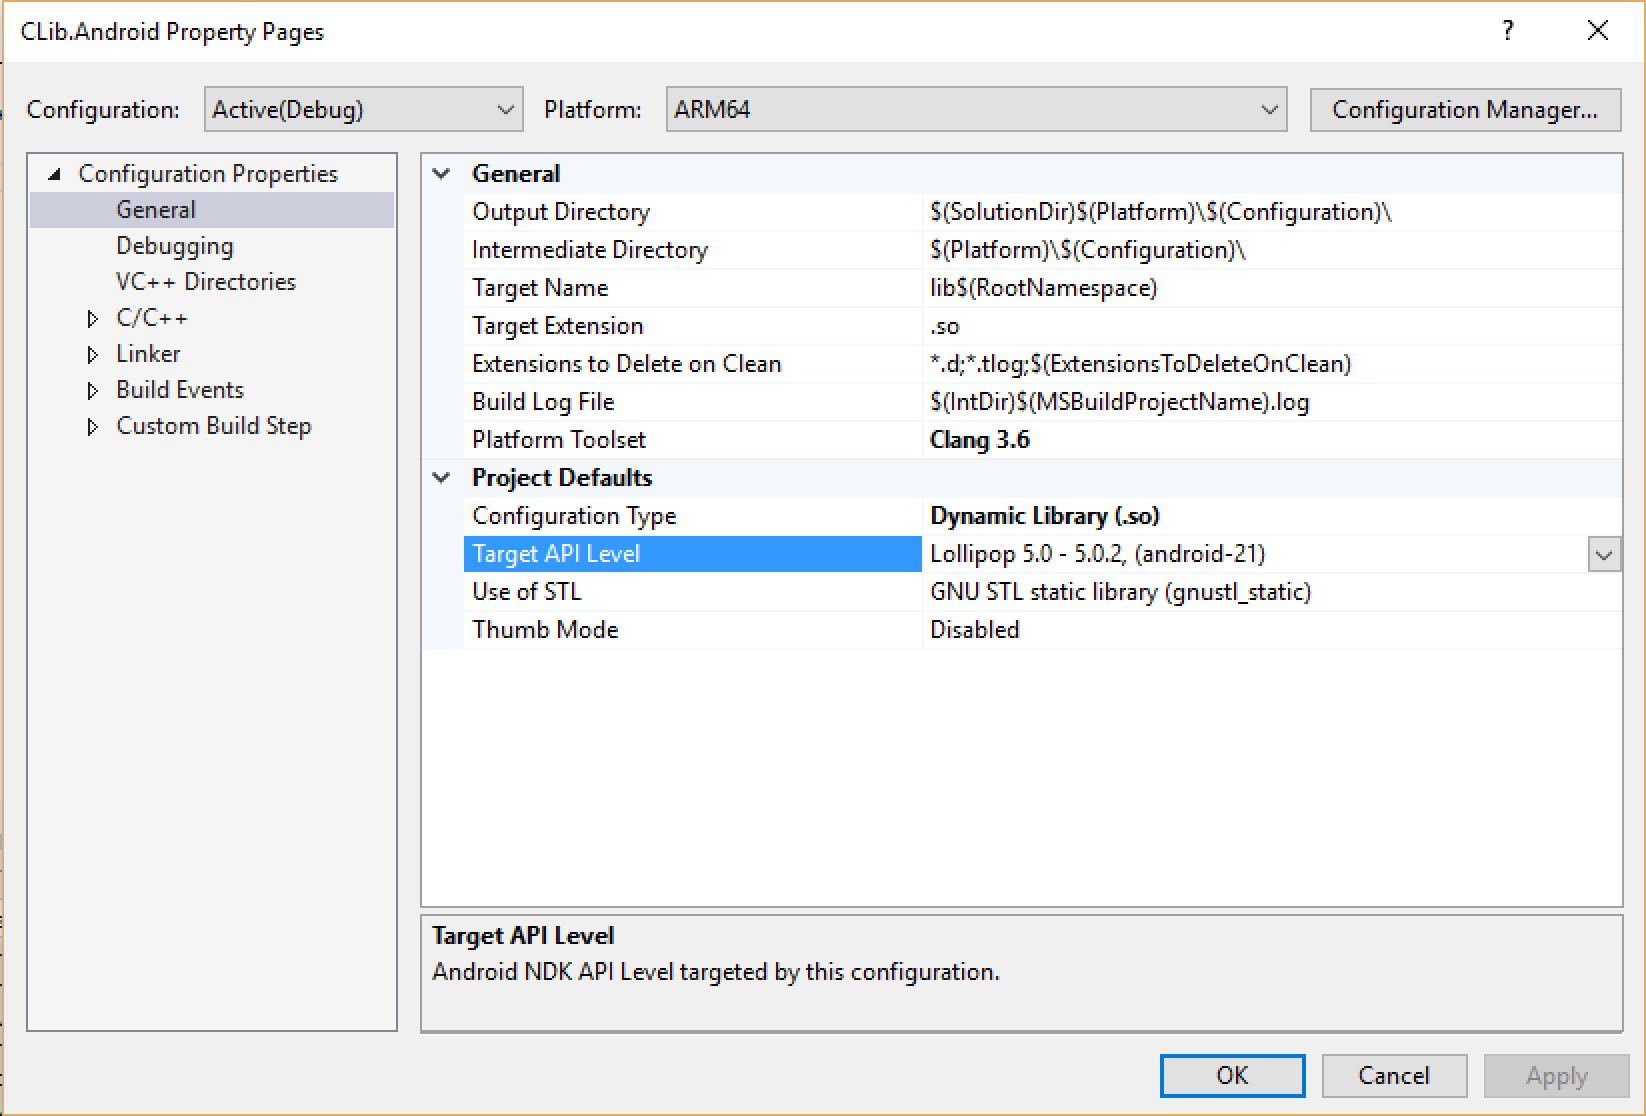
For the iOS project, the output format needs to be changed to a static library (.a file) since iOS does not allow dynamically loading code. For Android, a dynamic library (.so) should be built.

iOS Settings
Android Settings

While the Android library can be compiled within Visual Studio, compiling the iOS library needs a connection to a build agent on the Mac. This is not the regular Xamarin.iOS installation on a Mac but a Microsoft tool that is installed on OS X using npm. Visual Studio will communicate with this tool through TCP/IP.

Connection to build host

To call the native code, create a Xamarin project for iOS and Android each. Include the native libraries in the respective Xamarin projects.

On iOS, if you’re targeting multiple processor architectures (either supporting pre-iPhone 5s or supporting the simulator), you can build the iOS project for multiple platforms using the dropdown in the toolbar. Then, combine the libraries into one using lipo according the Xamarin docs. On Android, you’ll need to modify the .csproj according to the Xamarin documentation to specify the .so files for each platform.

The calls into the native code are regular P/Invoke calls (although DLLs don’t play a role here). On Android, you specify the name of the shared library.

On iOS, use the special Mono name __Internal to call into the static library.

And that’s it! You can find the example code at https://github.com/lothrop/XamarinNative. In the example, I put the C# marshaling code into another shared project that is referenced by the Xamarin.iOS and Xamarin.Android projects.

Categories
Programming

Serial communication using Reactive Extensions

The main purpose of Reactive Extensions (Rx) is to enable processing event streams. I set out to use Reactive Extensions for receiving data on the serial port and learned some new things.

Here is the code that uses Observable.FromEventPattern<T>() to create an IObservable<T> from the .NET event SerialPort.DataReceivedEvent:

The event does not actually contain any information on the data received, it only indicates that there is data available. Reading the data is done inside the lambda expression. Reading serial data will return a list of bytes. This list may contain a complete message or just a part of a message or even multiple messages. To handle this, I want the observable to be an IObservable<byte>, i.e., it will produce a raw stream of bytes without any indication of where a message begins or ends. This is done through the extension method public static IObservable<TResult> SelectMany<TSource, TResult>(this IObservable<TSource> source, Func<TSource, IEnumerable<TResult>> selector) that is used to flatten the sequence returned by the lambda.

So I now have a stream of bytes. I want these bytes to be chunked into messages. For my particular protocol, messages are separated by a special byte. Separation can be done in two ways:

Here, a new observable is created using Observable.Create(). This observable subscribes to the byte stream, collects the data in a local collection and fires OnNext() whenever a message delimiter is encountered.

This version uses the Scan() operator to achieve the same thing. The output is an IObservable<IEnumerable<byte>> that fires an IEnumerable<byte> for every new message.

This code worked well up until the point I started attaching multiple observers to the message stream, one to process the messages and one to just dump received messages to a debug console. What happened then was that the code in the first code sample was called multiple times: once for each subscriber. This meant that each chunk of serial data was only received by one subscriber, not all subscribers. There are two possible solutions to this: Either introduce a Subject<IEnumerable<byte>> subscribing to serialPortSource and have consumers subscribe to the subject or use the Publish() operator that does the work for you.

Creating a new observable that produces deserialized messages from the observable producing lists of bytes is now trivial using a simple Select().

What remains is the question of how to use the received data in a typical workflow of sending out a message and receiving a response in return. Here is an example:

This example uses the Replay() operator. Replay will capture all events from the observable that are fired after the call to Connect(). After calling Connect() the call is sent to the device at the other end of the serial connection. The second await filters the incoming messages for the desired message (even using a filter criterion that was not known before the request was sent), adds a timeout, uses FirstAsync() to return an observable that only returns the first element followed by OnCompleted(), and waits for that OnCompleted() using await. Since Replay() is capturing all messages, the following await call on the observable should consider all answers from the target, whether they are received before or after the second call to await.

Categories
Programming

Automated mobile UI testing with Xamarin.UITest and Xamarin Test Cloud

I published a blog post at the Zühlke Blog on mobile UI testing with Xamarin.UITest and Xamarin Test Cloud:

https://www.zuehlke.com/en/insights/automated-mobile-ui-testing-xamarinuitest-and-visual-studio-app-center

Categories
Programming

async/await part 2: Understanding the await keyword

In part 1 of this series we looked at the async keyword. async without await is possible (though not very useful) but await without async not. If you want to use await inside a method it must be marked as async.

The await keyword

Here is an example of a method using await:

Apart from the keywords async and await and the funny return value this looks just as you would write a synchronous method: Download a web page, then apply a regular expression to its contents to see if it matches.

And that is just the point. Although this method is asynchronous, it looks and feels like a synchronous method. But unlike its counterpart, the async method won’t block the caller until it is finished, won’t stay stuck in your mouse click event handler and, most importantly, won’t freeze the rest of your application.

How does does it work?

What happens when this method is called is that it executes just like any other method up to the point where the first await is encountered. At that point, the method returns to the caller with a Task (let’s call it method task) that contains information about the state of its work. As soon as the Task returned by GetStringAsync() completes the remainder of the method is executed. Note that all local variables are preserved and are available just as in a standard non-async method. When the method is finished with completing the remainder of its work (applying the regular expression) it will magically set the method task’s Result property to the value passed to the return statement and mark the Task as completed.

Typically, calls to async methods will be called and awaited by other async methods so the caller of our DoesWebContentMatchPatternAsync() method will not have to do anything special to receive this result. All it takes is writing await in front of the method call.

This will generate a compiler error if that method is not async.

How do I introduce await?

In practice, you’ll see this happen a lot when asyncifying existing code. The procedure is always the same:

  1. Add an await inside a method.
  2. Realize it doesn’t compile anymore because it is not async.
  3. Add async to the method’s declaration.
    1. If the return type was void, change it to Task.
    2. If the return type was of any type T, change it to Task<T>.
  4. Add the Async suffix to your method name using your favorite refactoring tool.
  5. Repeat from step 1 for the calling method.

This typically leads to async/await creeping through your entire codebase after some time but will leave a good feeling of accomplishment afterwards.

But what about exceptions?

But the magic of await doesn’t stop there. Another tedious task of asynchronous programming is catching and handling errors that occur in code running in the background. async/await handles this problem very elegantly by propagating exceptions through the Task‘s IsFaulted and Exception properties. What this means is that you can write exception handling code just as you would with synchronous code.

If you don’t catch the exception it will propagate to the calling method, just like with synchronous code. As long a your code is async/await all the way you won’t have to do anything differently.

Background work and the UI thread

The last piece of magic comes in the form of context synchronization. Another common pitfall in asynchronous programming comes from the fact that most UI technologies rely on a single UI thread to handle all modifications of the UI. Modifying a UI element from a different thread will typically lead to an exception being thrown. Let’s look at another piece of code using our method from above:

The code shows an event handler for a button click in a WPF code-behind (so not the place you would typically implement this functionality). The line assigning a new value to resultBox.Text is a line that has to be called from the UI thread in WPF. However, there is no code marshaling the call back to the UI context. This is because the default behavior of async/await is to try and execute the remainder of the code following an await call back into the original context for you.

This behavior is typically only needed for UI code and should be disabled for all other code as it adds overhead and may cause deadlocks. Disabling is achieved by calling ConfigureAwait(false) on the Task to be awaited:

This tells the compiler that it is OK to execute the remainder of the method (i.e., everything following the call to await) in the same context as the work done in the awaited call.

Give it a shot!

If you’re already on .NET 4.5 I suggest you give async/await a try. It will change the way you look at asynchronous programming.

Categories
Programming

async/await part 1: Understanding the async keyword

By far my favorite feature of .NET 4.5 is async/await, or, as Microsoft call it, the Task-based Asynchronous Pattern (TAP). It is something I didn’t know I was missing until I saw a recording of Anders Hejlsberg’s Build talk on the subject. Shortly after this, I had a highly asynchronous C++ embedded project that lasted for over a year where I felt miserable building state machine after state machine to handle the inherent problem of all asynchronous programs: What do you do after your asynchronous operation completes?

This blog series is aimed at C# programmers new to async/await. A general understanding of the Task class introduced with .NET 4.0 is expected. In this first part, I’ll explain the async in async/await.

What is async?

The async keyword can be used to decorate a method or lambda expression.

It is important to note that async is not a part of the method signature, so if you are implementing an interface or overriding a virtual or abstract method you have a choice of whether to use async or not.

Return types

An async method may only return void, Task or Task<T> for any concrete type T.

void as a return type should be avoided where possible and is generally only needed in event handlers, making the method a fire-and-forget method where the caller has no way of knowing when the call finished or failed.

If you write a method returning Task or Task<T> you should generally follow the convention of using the suffix Async in your method name to indicate that the method can be awaited (regardless of whether you method’s implementation uses async or not).

Task should be returned for methods that would, if they were synchronous methods, return void. Task<T> should be returned for methods that would otherwise return some type T (i.e., anything not void). Think of the Task as the object the caller can use to keep track of what ever happened to that asynchronous method he triggered.

What effect does async have?

Writing async will do two things to your method or lambda:

  1. It will allow you to write await in your method (see my next blog post in this series).
  2. If your return type is not void the compiler will automagically convert your return statement (or the missing return statement at the end of your method) into a Task<T> or Task.

For a method that does not contain any await calls, this means a completed Task will be returned without the need to explicitly specify this. For the above example this means it will behave exactly like this non-async version of it:

For a method that does contain an await in the executed path, the method will return a Task object that will turn to the IsCompleted state when the last awaited call has completed and the synchronous code following it (if any) has finished executing. (For more on this, read my next blog post in this series about the await keyword.)

Do I need async?

Methods containing only one await statement as the very last instruction in the method may generally be written without the async keyword. For example, the method

is equivalent to

Even though this yields the same result, the method declared as async seems to be the more readable version and has a slight runtime penalty. The other difference here is that if stream.FlushAsync() throws an exception and await is not used FlushTheStreamAsync() will not appear in the exception’s call stack (more on exceptions in the next blog post).

How does that help me?

As mentioned earlier, the returned Task object can be used to examine the state of the asynchronous call (still running? completed? failed? cancelled?). While this is possible using the various methods of the Task class, the easiest way to handle this is through the await keyword handled in the next blog post.

Categories
Programming

DWX13 Follow-up: Detecting jumps with Kinect and Reactive Extensions

At Developer Week 2013 I gave a talk (in German) on Reactive Extensions. The slides are online on Slideshare. During the talk, I live-coded a part of a console-based jump and run game that uses Kinect as input. The first task was to detect when the player (the volunteer on stage) jumped. Here’s the code from the demo:

This code contains a lot of simplifications for presentation purposes but it can still be used to explain some Reactive Extension concepts. I’ll walk you through it and also spell out the vars:

This retrieves the single Kinect that is attached to the PC (or throws an exception if there is not exactly one Kinect connected).

This creates an IObservable from the classic .NET event SkeletonFrameReady by telling Rx how to subscribe and unsubscribe from the event.

Interestingly, the class SkeletonFrameReadyEventArgs doesn’t contain any properties at all, just one method public SkeletonFrame OpenSkeletonFrame(); that can be used to access the skeleton data. The SkeletonFrame instance must then be disposed within 1/30 second.

We now have an IObservable that publishes a list of skeletons whenever there are people in front of the Kinect sensor.

This code extracts the joints from the single skeleton if it has a tracked state.

This extracts the average vertical position of the left and right foot. This is a simplification as it would be possible to trick the algorithm by just lifting one foot up twice as high as both feet would need to jump up. To fix this, you could Select() both feet in this statement.

This is the actual jump detection code. The idea is that to have jumped, the player would have to have his feet low, then high and then low again in a short timespan. To analyze this, we’re looking at samples from a time frame of one second. After this, we’ll move forward by 200 milliseconds and analyze again. This magic is provided by the Buffer() extension method. We’ll look for the maximum height of the feet within the time frame and see if the first and last samples are both lower than the maximum minus a hard-coded magic number (for simplification again). If the algorithm matches, the IObservable outputs the string “jumped”, else the string “didn’t jump”.

If you add jumped.Subscribe(Console.WriteLine); at this point you will see a stream of “didn’t jump” interrupted by a few instances of “jumped” whenever the player jumped.

The call to DistinctUntilChanged() will only output the string if it differs from the previously output string. The next line simply filters to only output “jumped” whenever the player jumps.

This line will output the resulting IObservable to the console.

This starts the Kinect sensor.

The presentation was a lot of fun. Thanks again to the volunteer! I’ll be back at Developer Week again this year talking about cross-platform mobile using C#.